
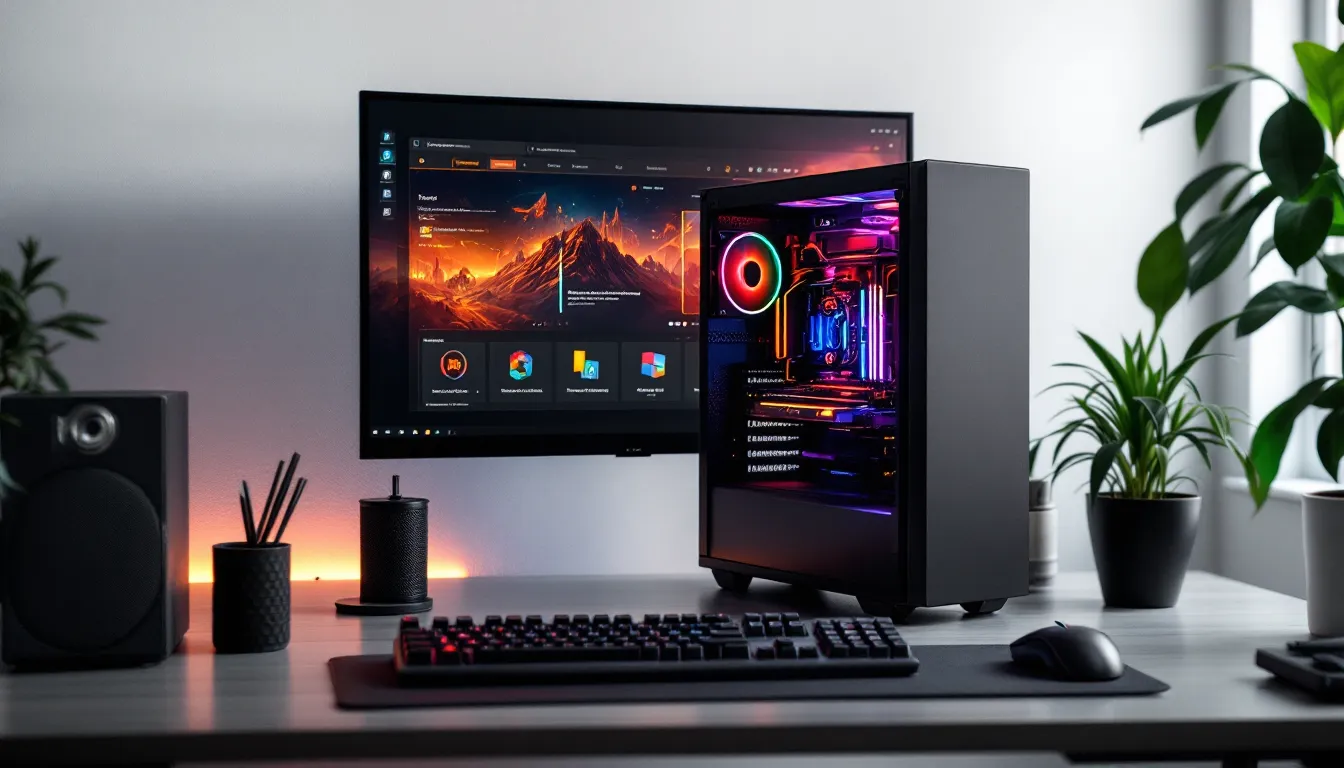

Building a gaming PC for $400 sounds impossible in 2026, right? With GPU prices that historically made wallets weep and new CPUs launching at premium tiers, the budget builder might feel left behind. But here’s the thing: the used market has never been better, and last-gen components are hitting sweet spots for performance per dollar.
This guide walks through the exact parts, sourcing strategies, and build process needed to assemble a functional gaming rig that won’t embarrass itself in 2026’s 1080p landscape. No filler, no fantasy builds with “approximate” pricing that magically exceeds budget by $200. Just real components, real prices, and realistic performance expectations for gamers who want in without very costly.
Key Takeaways
- A $400 gaming PC in 2026 delivers genuine 1080p gaming performance in competitive titles, esports games, and older AAA releases when expectations are realistic and settings are optimized.
- Strategic use of the used GPU market is essential to building a $400 gaming PC—focus on used GTX 1650 Super cards ($110-$130) paired with budget CPUs like the Ryzen 5 5500 or i3-12100F for maximum value.
- Enable XMP/DOCP RAM settings and optimize in-game graphics (disable shadows, use low-medium textures, disable post-processing) to gain 10-30% more FPS without additional hardware investment.
- A quality power supply from a reputable brand is non-negotiable—never compromise on the PSU to save $10-15, as a failing unit can destroy all other components.
- Your $400 gaming PC serves as an upgrade-friendly foundation; prioritize GPU upgrades first when budget allows, with a clear 2-3 year upgrade path to maintain 1080p gaming performance as new titles release.
Is a $400 Gaming PC Worth It in 2026?
The short answer: yes, but with clear boundaries. A $400 build in 2026 isn’t competing with mid-range or high-end systems, and pretending otherwise sets up disappointment. What it does offer is entry into PC gaming at 1080p with playable frame rates in most titles when settings are dialed appropriately.
This budget sits in an interesting spot. It’s enough to avoid pure e-waste territory but requires smart part selection and realistic expectations. The goal isn’t maxed-out graphics or 144 FPS in the latest AAA releases. It’s smooth gameplay in competitive titles, solid performance in older or indie games, and a foundation that can be upgraded over time.
What Games Can You Actually Play?
Competitive multiplayer games run surprisingly well on budget hardware. Valorant, CS2, League of Legends, and Fortnite (on lower settings) all hit 60+ FPS consistently with the builds outlined later. These games are optimized for accessibility, and a $400 system handles them without issue.
Popular online titles like Apex Legends, Overwatch 2, and Rocket League remain playable at medium-low settings, typically landing between 50-75 FPS. Not buttery smooth, but absolutely functional for casual to intermediate play.
AAA single-player games from 2020-2023 are the realistic sweet spot. Elden Ring, God of War, Cyberpunk 2077 (with FSR upscaling), and Resident Evil 4 Remake all run at 30-45 FPS on low-medium settings at 1080p. Older AAA titles from 2015-2019 like The Witcher 3, GTA V, and Red Dead Redemption 2 perform even better, often reaching 60 FPS with tweaked settings.
Indie and esports titles are where budget builds shine. Hades, Stardew Valley, Terraria, Hollow Knight, and similar games run flawlessly. The Steam library’s back catalog becomes entirely accessible.
Performance Expectations: 1080p Gaming Benchmarks
Real-world performance from a $400 build in early 2026 clusters around these numbers, based on systems using a Ryzen 5 5500 or Intel i3-12100F paired with a GTX 1650 Super or RX 6500 XT:
Competitive/Esports Titles (Low-Medium Settings):
- Valorant: 120-180 FPS
- CS2: 90-130 FPS
- Fortnite: 70-100 FPS
- League of Legends: 140+ FPS
Modern AAA Games (Low Settings, 1080p):
- Cyberpunk 2077 (FSR on): 35-45 FPS
- Starfield: 30-40 FPS
- Hogwarts Legacy: 35-50 FPS
- Call of Duty: Modern Warfare III: 50-65 FPS
Older AAA Titles (Medium Settings, 1080p):
- Elden Ring: 45-60 FPS
- The Witcher 3: 60-75 FPS
- GTA V: 70-90 FPS
- Doom Eternal: 90-120 FPS
These aren’t cherry-picked best-case scenarios. They represent typical performance with optimized settings. Frame times might spike during intense moments, and graphical compromises are non-negotiable. But for someone coming from console gaming or looking to enter PC gaming affordably, these numbers represent genuinely playable experiences.
The Complete $400 Gaming PC Parts List
Here’s a realistic parts breakdown for a $400 gaming PC in 2026. Prices assume a mix of new budget components and used parts from reputable sources. All prices are approximate and fluctuate based on region and availability.
Total Build Cost: $395-$415
| Component | Model | Price Range | New/Used |
|---|---|---|---|
| CPU | Ryzen 5 5500 / i3-12100F | $75-$95 | New |
| GPU | GTX 1650 Super / RX 6500 XT | $110-$140 | Used/New |
| Motherboard | B450M / H610M | $50-$65 | New |
| RAM | 16GB DDR4-3200 | $35-$45 | New |
| Storage | 500GB NVMe SSD | $25-$35 | New |
| PSU | 500W 80+ Bronze | $35-$50 | New |
| Case | Budget ATX/mATX | $30-$45 | New |
CPU: Best Processors Under $100
The AMD Ryzen 5 5500 typically runs $80-$90 and offers six cores and twelve threads on the AM4 platform. It’s not the flashiest chip AMD ever made, but for budget gaming it punches above its price class. Base clock sits at 3.6GHz with boost to 4.2GHz, and it pairs well with affordable B450 or A520 motherboards.
Intel’s i3-12100F (the F means no integrated graphics, which is fine since a dedicated GPU is required anyway) costs $75-$85 and delivers four cores and eight threads with surprisingly strong single-core performance. It uses Intel’s 12th-gen architecture, which means better IPC (instructions per clock) than older budget options. Motherboard selection is trickier since it requires LGA1700 socket boards, but H610 options keep costs reasonable.
Both CPUs handle 1080p gaming without bottlenecking budget GPUs. The 5500 edges ahead in heavily multithreaded workloads, while the 12100F shows stronger performance in games that prioritize single-thread speed. Either choice works: availability and motherboard pricing often make the decision.
Avoid older options like the Ryzen 3 3100 or i3-10100F unless they’re significantly cheaper ($50 or less). The performance gap to newer budget chips has widened enough to matter.
GPU: Finding Graphics Cards in the $100-$150 Range
The GPU eats the largest chunk of a gaming budget, and this tier requires careful shopping. Recent hardware analysis from Hardware Times shows that used GTX 1650 Super cards offer the best value in this range, especially models from EVGA or MSI.
The GTX 1650 Super from Nvidia’s 2019 Turing lineup still holds up surprisingly well. With 4GB GDDR6 VRAM and decent 1080p performance, used models run $110-$130 on eBay, Facebook Marketplace, and r/hardwareswap. Look for dual-fan models for better thermals. The regular GTX 1650 (non-Super) is noticeably weaker and should be avoided unless priced under $90.
AMD’s RX 6500 XT appears new for $130-$150 but comes with significant caveats. It’s a 2022 budget card with only 4GB VRAM and a cut-down PCIe 4.0 x4 interface that handicaps performance on PCIe 3.0 systems (which most budget builds use). Performance roughly matches the 1650 Super in modern titles but falls behind in older games that rely on hardware encoding features AMD stripped out. Only grab this if you find it under $120 new.
The used GTX 1060 6GB occasionally pops up for $100-$120 and offers more VRAM than the 1650 Super, which helps in certain titles. Performance is roughly equivalent, maybe slightly behind in newer games but ahead in VRAM-intensive scenarios. Not a bad alternative if condition is good.
Higher-end used options like the GTX 1660 Super or RX 5600 XT sometimes dip to $140-$160 and represent meaningful upgrades (15-25% more performance), but they’ll push total budget over $400 unless other compromises are made.
Motherboard, RAM, and Storage Essentials
Motherboard selection depends on CPU choice. For the Ryzen 5 5500, any B450M board from ASRock, Gigabyte, or MSI works fine. These run $50-$65 new and support the AM4 socket with sufficient VRMs (voltage regulator modules) for a 5500. Ensure the BIOS is updated to support 5000-series Ryzen chips: most boards shipping in 2025-2026 come ready, but verify before buying.
For the Intel i3-12100F, H610M boards are the budget option at $55-$70. They’re basic but functional. Skip the temptation to buy ultra-cheap $40 boards with sketchy VRMs or missing features like M.2 slots.
RAM is straightforward: 16GB (2x8GB) DDR4-3200 CL16 is the sweet spot. Brands like Corsair Vengeance LPX, G.Skill Ripjaws, or TeamGroup T-Force all offer kits for $35-$45. Don’t cheap out on single-channel 8GB: the performance hit in modern games is substantial. Also, don’t overspend on RGB or 3600MHz kits, the difference at this performance tier is negligible.
Storage needs to be fast but doesn’t need to be huge. A 500GB NVMe SSD from brands like Kingston NV2, Team MP33, or Crucial P3 costs $25-$35. This provides enough space for Windows, a few AAA games, and several smaller titles. HDDs are too slow for a boot drive in 2026 and kill the user experience. Add mechanical storage later if needed, but start with NVMe.
Power Supply and Case: Don’t Skip These
The power supply is where budget builders often stumble. A system with a 5500 and 1650 Super pulls around 250-300W under gaming load, so a 500W 80+ Bronze PSU provides headroom. EVGA (if still available), Corsair CV series, or Thermaltake Smart series run $35-$50.
Never buy unbranded or sketchy PSUs. They’re the one component that can destroy everything else if they fail catastrophically. Stick to recognized brands with at least 80+ Bronze certification. Modular cables are a luxury, not a necessity: non-modular is fine to save $10-15.
Cases at the $30-$45 range include options like the Thermaltake Versa H18, Cooler Master MasterBox Q300L, or Deepcool MATREXX 30. Prioritize airflow over aesthetics. At least one included fan is helpful, and space for a 2.5″ SSD and ATX PSU (or mATX, depending on motherboard) is required. Tempered glass side panels look cool but aren’t worth extra cost at this budget.
New vs. Used Parts: Maximizing Your $400 Budget
Stretching $400 into a functional gaming PC in 2026 demands strategic use of the used market. Buying everything new at this price point results in a significantly weaker system. The key is knowing which components carry acceptable risk used and which should always be purchased new.
Where to Find the Best Deals on Used Components
Reddit’s r/hardwareswap remains one of the best marketplaces for PC parts. Sellers build reputation through confirmed trades, and PayPal Goods & Services provides buyer protection. Prices tend to be fair, and the community actively calls out scams. Shipping adds $10-20, but selection is excellent.
eBay offers buyer protection and a massive inventory, but prices run 10-20% higher than private sales. Filter for “used” condition and check seller ratings. “For parts/not working” listings are gambles not worth taking at this budget. eBay’s authentication program for GPUs over $750 doesn’t apply here, so scrutinize photos and descriptions.
Facebook Marketplace and Craigslist enable local pickup, saving shipping costs and allowing inspection before purchase. Risk is higher since transactions are typically cash-based with no platform protection. Meet in public places, test components if possible, and trust your instincts. Prices can be exceptional from sellers who just want stuff gone quickly.
Mercari and OfferUp fall between eBay and Facebook in terms of protection and pricing. They’re worth checking but have smaller PC parts inventories.
Avoid Amazon Warehouse deals on critical components like GPUs and motherboards unless the discount is massive (40%+ off). Return reasons are often undisclosed, and the gamble isn’t worth it when alternatives exist.
Which Parts Are Safe to Buy Used?
GPUs are the primary used purchase target and generally safe if bought carefully. Graphics cards either work or they don’t, there’s not much middle ground. Check for physical damage, ask about smoking environments (tar buildup kills fans), and verify the model matches the listing (scammers sometimes flash BIOS to misrepresent cards). Test immediately upon arrival. Mining cards get a bad rap, but if they work, they work. Undervolted mining usage is often gentler than years of gaming thermal cycles.
CPUs are nearly indestructible and excellent used buys. Physical pin damage (AMD) or bent socket pins (Intel) are the only real concerns, and those are visible. CPUs don’t degrade from use under normal conditions. Just verify the model and socket type match your motherboard.
RAM is also low-risk used. It either functions or throws errors immediately. Test with MemTest86 if paranoid, but DOA rates are extremely low. Watch out for mismatched kits being sold as matched sets.
Cases are obviously fine used, though shipping costs often negate savings. Local pickup makes sense: paying $40 to ship a $30 case doesn’t.
Never buy used:
- Power supplies: Degraded capacitors and unknown failure points make this too risky. A failing PSU can destroy every other component. The $35-50 for new is mandatory insurance.
- Storage drives: SSDs have limited write endurance, and you’ll never know how much life remains. HDDs are mechanical and prone to failure. The $25-35 for a new SSD is non-negotiable.
- Motherboards (usually): They can be bought used, but DOA rates are higher than other components, and troubleshooting is a nightmare. Unless it’s a spectacular deal from a trusted source, spend the $50-65 on new for warranty coverage.
Step-by-Step Build Guide for Beginners
First-time builders often overthink the assembly process. Modern PC building is remarkably straightforward, components only fit one way, and the days of jumper settings and IDE cables are long gone. This isn’t delicate surgery: it’s expensive Lego.
Tools and Preparation
Required tools are minimal:
- Phillips-head screwdriver (magnetic tip helps but isn’t essential)
- Anti-static wrist strap (optional but recommended: alternatively, touch the metal case periodically to discharge static)
- Flashlight or headlamp for seeing inside the case
- Zip ties or velcro straps for cable management (often included with case)
Prepare the workspace:
- Clear a large, flat surface like a dining table or desk.
- Work on the motherboard box (cardboard is non-conductive) for initial component installation.
- Keep the component boxes nearby with manuals accessible.
- Watch one full build tutorial video beforehand for visual reference (Linus Tech Tips, JayzTwoCents, or Paul’s Hardware all have excellent guides).
Ground yourself before handling components. Static discharge is rare but can kill parts instantly. An anti-static strap clipped to the case frame eliminates risk entirely.
Assembly Process: From Start to Finish
Step 1: Install CPU on Motherboard
AMD Ryzen (AM4 socket):
- Lift the retention arm on the motherboard socket.
- Align the CPU’s gold triangle with the socket triangle.
- Drop the CPU in gently (no force required).
- Lower the retention arm until it clicks.
Intel 12th-gen (LGA1700 socket):
- Lift the retention bracket.
- Align the CPU notches with the socket.
- Place CPU down gently.
- Lower the bracket and secure the locking lever (requires moderate force: don’t panic).
Never touch the CPU pins (AMD) or contact pads (Intel). Hold by the edges only.
Step 2: Install RAM
Snap the RAM into the motherboard’s DIMM slots, typically slots 2 and 4 (consult motherboard manual for dual-channel configuration). Push firmly until both side clips snap into place. The notch on the RAM stick ensures correct orientation.
Step 3: Install M.2 SSD
Locate the M.2 slot on the motherboard (usually below the CPU socket or near the bottom). Remove the tiny screw, insert the SSD at a 30-degree angle into the slot, press down gently, and secure with the screw. Some boards include a heatsink: attach it if present, though it’s not critical for budget NVMe drives.
Step 4: Install I/O Shield and Motherboard into Case
Snap the I/O shield (the metal rectangle with port cutouts) into the case’s rear opening from the inside. Lower the motherboard into the case, aligning standoffs (pre-installed brass posts) with motherboard holes. Screw the motherboard down with included screws. Don’t overtighten: snug is sufficient.
Step 5: Install Power Supply
Position the PSU in the case’s PSU shroud or bottom compartment, fan facing down (if the case has bottom ventilation) or toward the interior (if no bottom vent). Secure with four screws from the case’s exterior.
Step 6: Connect Front Panel and Power Cables
This is the fiddliest part. Connect:
- 24-pin ATX power to the motherboard (large connector, can only go one way).
- 8-pin or 4+4-pin CPU power to the top-left of the motherboard near the CPU.
- SATA power to any SATA drives (not needed for M.2 NVMe).
Connect front panel headers (power button, LED, USB, audio) according to the motherboard manual. These tiny connectors are annoying but labeled. Take your time.
Step 7: Install GPU
Remove the appropriate PCIe slot covers from the case (usually the top two). Insert the GPU into the top PCIe x16 slot (closest to CPU), pressing firmly until the retention clip clicks. Secure the GPU bracket to the case with screws. Connect the 6-pin or 8-pin PCIe power from the PSU to the GPU if required (GTX 1650 Super needs one 6-pin: some models don’t need external power).
Step 8: Cable Management and Final Checks
Route cables behind the motherboard tray if the case allows. Secure with zip ties. Ensure:
- All power connections are fully seated.
- RAM clicks are engaged.
- GPU is locked in place.
- No loose screws are rattling in the case.
Attach the side panels, connect the monitor to the GPU (not motherboard), plug in keyboard and mouse, and connect power. Press the power button and hope for POST (power-on self-test beep or display output).
If it doesn’t boot, don’t panic. Reseat the RAM, verify all power connections, and ensure the monitor cable is in the GPU, not motherboard.
Optimizing Your Budget Gaming PC for Maximum FPS
Building the PC is half the battle. Proper configuration and optimization can add 10-30% more performance without spending a dollar. These tweaks matter significantly on budget hardware where every frame counts.
BIOS Settings and Overclocking Basics
Enter BIOS (usually by pressing Delete or F2 during boot) and verify:
Enable XMP/DOCP for RAM: This sets RAM to its rated speed (3200MHz) instead of the default 2133MHz. The performance difference in games is 5-15% on Ryzen systems. Find this under “Memory” or “Overclocking” settings. It’s a one-click toggle.
Set PCIe to Gen 3 (if using RX 6500 XT on older board): Some B450 boards default to PCIe Gen 2, which throttles the 6500 XT significantly. Force Gen 3 in BIOS settings if available.
Disable unnecessary devices: Integrated audio (if using USB headset), unused SATA ports, and legacy USB support free minimal resources but every bit helps.
CPU overclocking on these budget chips usually isn’t worth the effort. The Ryzen 5 5500 has limited headroom, and the i3-12100F is locked. Leave them at stock settings.
GPU overclocking, but, can yield 5-10% gains. Use MSI Afterburner to increase the core clock by +50-100MHz and memory clock by +200-400MHz. Stress test with FurMark or game for 30 minutes. If stable, increase incrementally. If crashes occur, dial back. Don’t touch voltage: it’s not worth the heat and power draw on budget cards.
Windows Optimization and Driver Installation
A fresh Windows 11 install is ideal, but if using an existing installation, clean it up:
Disable startup programs: Press Ctrl+Shift+Esc to open Task Manager, navigate to the Startup tab, and disable everything except security software and critical drivers.
Install latest GPU drivers: Download directly from Nvidia or AMD, not Windows Update. Choose “Custom Install” and select “Clean Installation” to wipe old driver remnants.
Disable Windows visual effects: Right-click “This PC” > Properties > Advanced System Settings > Performance Settings > Adjust for best performance. This frees RAM and GPU resources.
Enable Hardware-Accelerated GPU Scheduling (Windows 11): Settings > System > Display > Graphics > Change default graphics settings > toggle on. This can improve frame pacing slightly.
Disable Game DVR and Xbox Game Bar: Settings > Gaming > turn off Game Bar, captures, and broadcasting. These features tank performance on low-end systems.
Set Windows power plan to High Performance: Control Panel > Power Options > High Performance. This prevents CPU throttling during games.
Run Windows Update until fully current, then install motherboard chipset drivers from the manufacturer’s website. Audio, LAN, and USB drivers matter for stability.
In-Game Settings for Best Performance
Generic recommendations that work across most titles:
Resolution: Lock to 1920×1080. Do not use dynamic resolution or upscaling unless the game supports FSR or DLSS (which budget GPUs typically don’t, except FSR on select titles).
Texture Quality: Medium. Budget GPUs with 4GB VRAM handle this. High textures often exceed VRAM and cause stuttering.
Shadows: Low or Off. Single biggest FPS drain in most games for minimal visual benefit.
Anti-Aliasing: Off or FXAA. TAA is too expensive: MSAA is absurdly expensive. FXAA provides light smoothing with negligible cost.
Post-Processing: Low or Off. Motion blur, depth of field, and bloom eat frames for cinematic effects that obscure visibility in competitive games anyway.
View Distance: Medium. Low looks terrible: Ultra is overkill and impacts CPU performance.
Effects Quality: Low. Explosions and particles are pretty but costly.
Monitor FPS with an overlay (MSI Afterburner with RivaTuner, or Steam’s built-in FPS counter). Target 60 FPS in single-player, 75+ in competitive titles. Adjust settings from there. According to testing covered by PC Gamer, the difference between medium and low shadows alone can yield 15-20 FPS in modern titles.
Enable FreeSync or G-Sync Compatible if your monitor supports it. This smooths frame pacing even when FPS dips below 60, making 45-55 FPS feel significantly better.
Upgrade Path: Growing Your $400 PC Over Time
One advantage of building a PC over console gaming is the ability to incrementally improve performance. A $400 system isn’t the finish line: it’s the foundation. Planning upgrades strategically maximizes return on investment.
Which Component to Upgrade First
The GPU is always the first upgrade for gaming performance. Everything else in the system can remain unchanged while a GPU swap delivers immediate, dramatic FPS increases. When budget allows, moving from a GTX 1650 Super to something like a used RTX 3060 ($180-220 used in 2026) or RX 6600 ($160-190 used) doubles performance in most titles.
Wait until at least one year post-build for GPU upgrades, allowing the used market to bring newer cards into affordable range. The 500W PSU in this build supports GPUs up to around 200W TDP (like the 3060 or 6600), so no PSU upgrade is needed for mid-range GPUs.
Storage is the easiest upgrade. A second 500GB or 1TB SSD runs $30-60 and just plugs into an empty M.2 slot or SATA port. Do this whenever game library size demands it.
RAM upgrading from 16GB to 32GB makes sense if heavily multitasking or playing specific memory-hungry titles, but it’s not a gaming priority. Wait until 32GB kits drop under $60.
The CPU usually doesn’t need upgrading for 2-3 years on this build. Both the 5500 and 12100F keep up with budget and mid-range GPUs at 1080p. If eventual GPU upgrades reach high-end territory (RTX 4070-level or above), then consider a CPU upgrade. For AM4, jumping to a used Ryzen 5 5600X ($90-110 used) or 5700X ($130-150 used) is a drop-in upgrade. For Intel LGA1700, moving to an i5-12400F ($110-130 used) provides meaningful gains.
Never upgrade the CPU before the GPU on a gaming build unless the existing CPU is ancient (which the 5500 and 12100F are not).
Future-Proofing on a Tight Budget
Future-proofing is mostly marketing nonsense, but smart choices extend a build’s relevance:
Don’t chase features you can’t use now: Ray tracing, DLSS 3, and other high-end GPU features don’t exist at the $400 tier. Build for current needs, upgrade later.
AM4 vs. LGA1700 upgrade paths: AM4 is a dead socket (no future CPUs), but used chips are plentiful and cheap. LGA1700 supports up to 14th-gen Intel, but budget boards (H610) limit upgrade potential due to weak VRMs. Both are fine: don’t overthink it.
Avoid 8GB RAM: 16GB is the floor for gaming in 2026. Some current titles already exceed 8GB usage. Don’t handicap the build to save $20.
Buy quality where it matters: The PSU and motherboard last through multiple builds. Spending an extra $10-15 on a reputable PSU or board with better VRMs pays off. The GPU and CPU are transient: they’ll be replaced.
Expect 2-3 years of solid 1080p performance from a $400 build, with declining settings over time as new games launch. Plan to invest another $150-250 in upgrades over that period to maintain playability. That’s still vastly cheaper than console gaming’s combined hardware and subscription costs.
Common Mistakes to Avoid When Building a Budget Gaming PC
Budget builds punish mistakes harder than high-end systems. There’s no performance overhead to absorb bad decisions. Here are errors that routinely destroy budget builds:
Cheaping out on the power supply: Already mentioned, but worth repeating. A $25 no-name PSU from Amazon is a ticking time bomb. Stick to reputable brands with 80+ certification, even if it means sacrificing $10-15 elsewhere.
Buying single-channel RAM: One 16GB stick instead of 2x8GB cuts memory bandwidth in half. Performance loss in games ranges from 10-25%. Always buy dual-channel kits. No exceptions.
Ignoring motherboard BIOS compatibility: Older B450 boards may need BIOS updates to support Ryzen 5000-series CPUs. Without another CPU to update the BIOS, you’re stuck. Verify the board supports the CPU out of the box or has BIOS Flashback functionality.
Skipping thermal paste application: Most coolers include pre-applied paste or a tube in the box. But if buying a used cooler or stock cooler separately, ensure thermal paste is applied. A CPU without paste overheats and throttles within seconds. Buyer guides from TechRadar emphasize that proper thermal paste application is non-negotiable for system stability.
Overspending on aesthetics: RGB RAM, tempered glass cases, and custom cables look great but add zero performance. Every dollar spent on looks is a dollar not spent on FPS. Prioritize function at this budget.
Buying an HDD as the primary drive: Mechanical hard drives in 2026 are unacceptable for boot drives. Windows load times, game launches, and general system responsiveness suffer dramatically. Use NVMe for the OS and primary games. Add HDD storage later if needed.
Not testing components immediately: Whether new or used, test everything within the return/dispute window. RAM can be DOA, GPUs can artifact, motherboards can fail to POST. Identify problems immediately while recourse exists.
Mixing incompatible parts: PCPartPicker catches most compatibility issues, but verify manually. Check TDP ratings, physical clearances (GPU length, CPU cooler height), and power connector requirements. A GPU that doesn’t fit the case or requires power connectors the PSU lacks is a $100+ mistake.
Forgetting about Windows licensing: Windows 11 costs $100+ retail, which obliterates a $400 budget. Options include using the free (but watermarked) unactivated version, transferring a license from an old PC, or purchasing an OEM key from grey-market sellers for $15-25 (ethically questionable but functional).
Ignoring thermal management: Budget cases often include one fan or none. A system with a single rear exhaust runs hot. Add a $10 intake fan if temperatures exceed 75°C on CPU or 80°C on GPU under load. Good airflow is cheap: replacing heat-damaged components isn’t.
Conclusion
Building a gaming PC for $400 in 2026 requires compromise, strategic shopping, and realistic expectations, but it’s absolutely viable. The system outlined here delivers genuine 1080p gaming performance across competitive titles, esports games, and older AAA releases. It won’t max out Cyberpunk 2077 or hit 240 FPS in Valorant, but it provides an authentic PC gaming experience at an entry-level price.
The real value isn’t just the initial performance. It’s the upgrade path, the learning experience, and the avoidance of console subscription fees. This build is a foundation that grows with the user’s budget and needs. Six months from now, adding a better GPU transforms the system. A year later, more storage or RAM keeps it current. That flexibility is impossible with console gaming.
For anyone sitting on the fence about PC gaming because of cost, $400 is enough to start. Not to dominate, not to flex, but to play, learn, and build something that’s genuinely theirs. That’s worth more than any benchmark number.